This article explains how users can enter data for students in their classes and additional helpful features.
Entering Data: The Basics
If you have more than one class:
Select the class you wish to enter data for on the "Classes" page.
Step 1
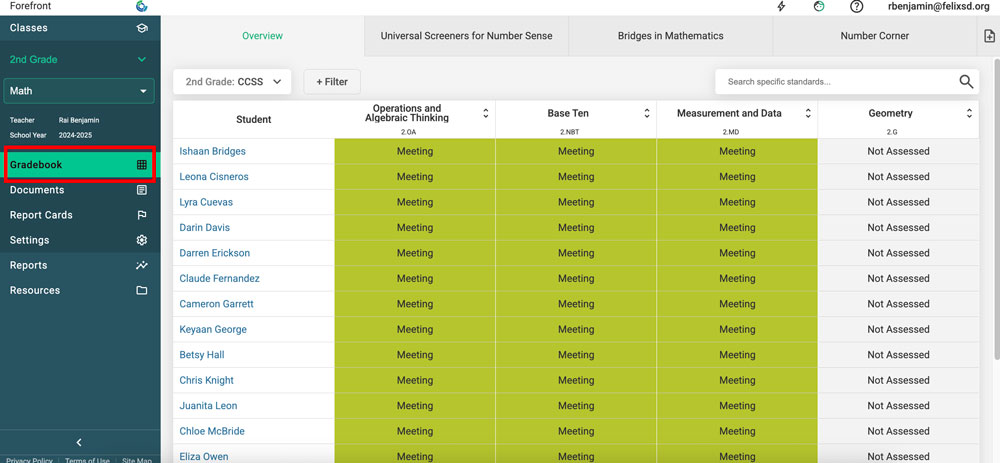
To access the Spreadsheet view, navigate to the Gradebook for a class.
Step 2
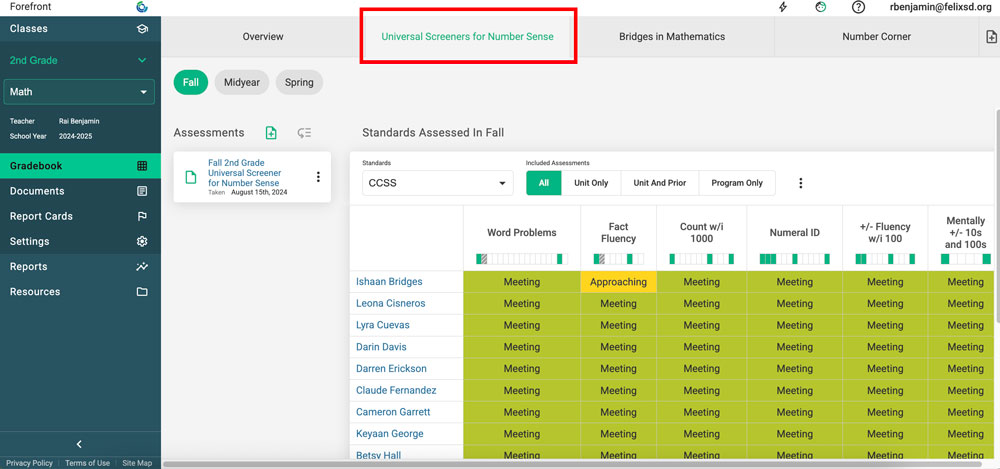
Select the tab for the program that includes the assessment.
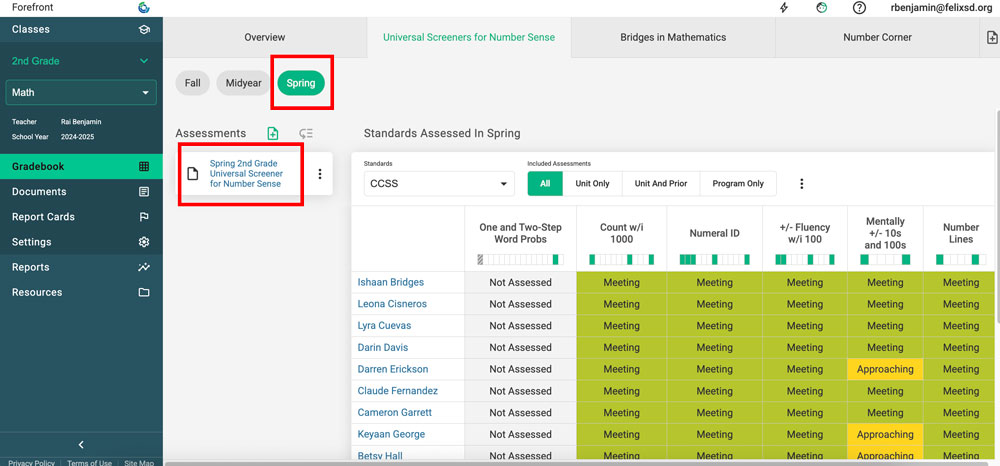
Step 3 and 4
Click the part of the assessment -- this is generally the unit, module, or the assessment. Then, click the name of the assessment.
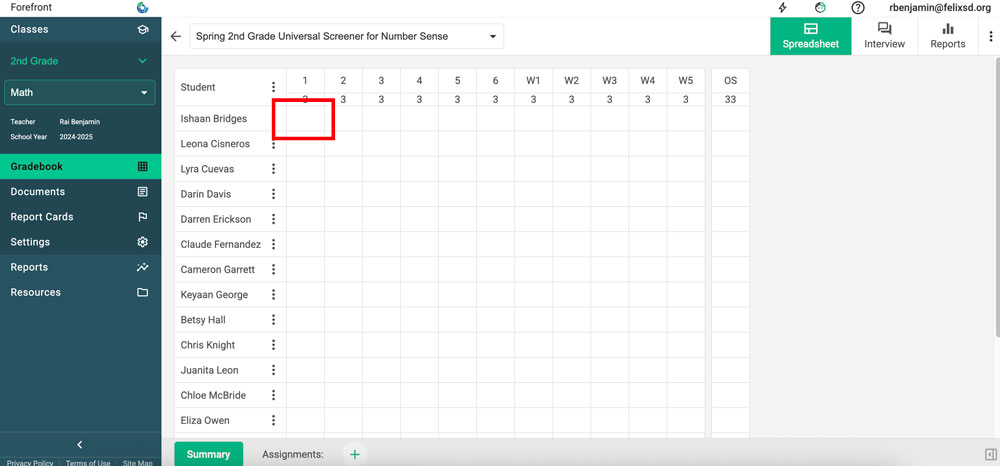
Step 5
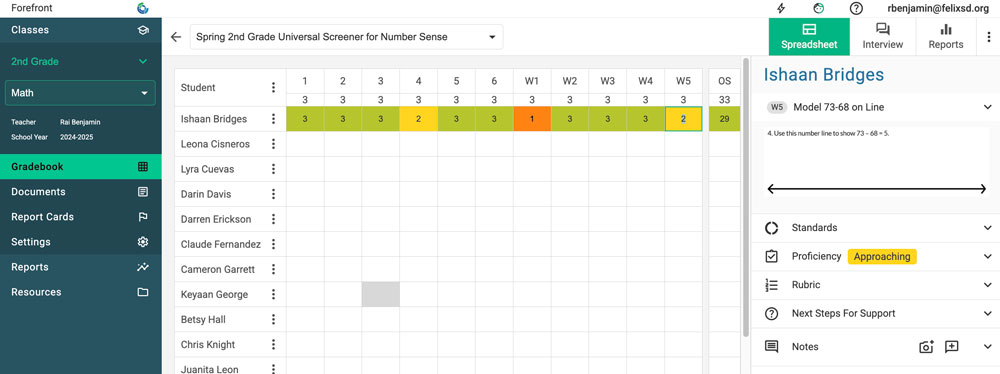
Clicking the name of the assessment opens the spreadsheet for data entry. Click into the relevant cell and enter a score.
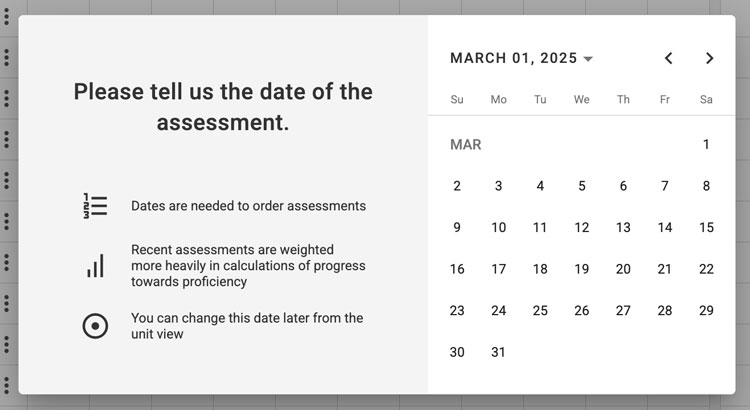
After entering a score, you will be prompted to select the date the assessment was given. This is important to enter correctly, as it dictates the proficiency calculation. It can be changed later.
As you enter data, the spreadsheet will change colors to show proficiency per question. The overall/total column depends on the assessment, but most commonly will populate with a proficiency when the whole assessment is completed. (Note: You may have an assessment with no overall or an assessment that is considered "completed" with any data and will generate an overall without all questions being completed.)
Features to Make Data Entry More Efficient and Useful
Autopopulate Gradebook Spreadsheets
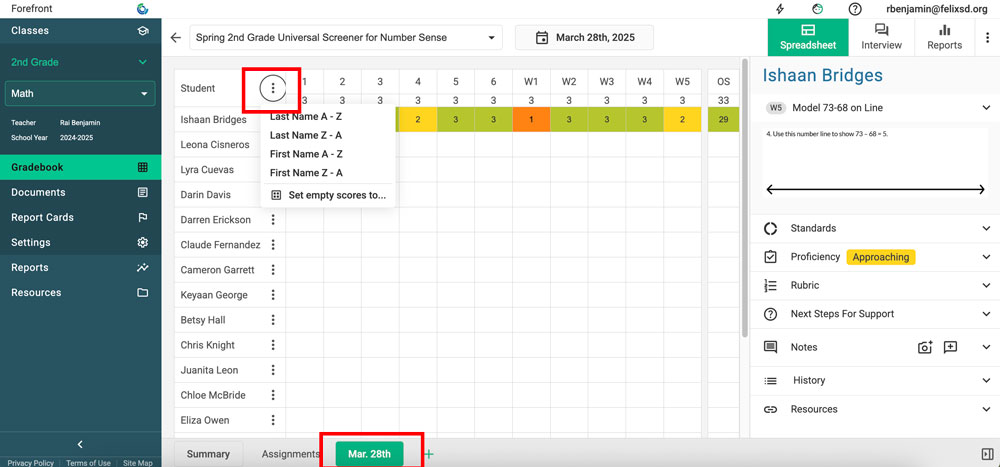
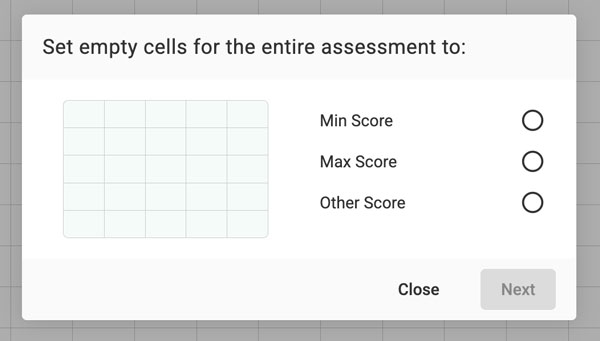
You may autopopulate or autofill a spreadsheet or task with the maximum point value and then modify individual cells or student rows to expedite data entry. To autopopulate the entire spreadsheet, select the three dots in the upper left-hand corner and click "Set empty scores to..." This will open a module where you can set empty scores to the maximum score, the minimum score, or some other value. Note: If the option is greyed out, make sure you are clicked into the correct date tab at the bottom (see the green button in the screenshot).
If you wish to just set the score to max, min or other value for a specific question or task, right-click on the item number and select "Set empty scores to..." Note: If the option is greyed out, make sure you are clicked into the correct date tab at the bottom.
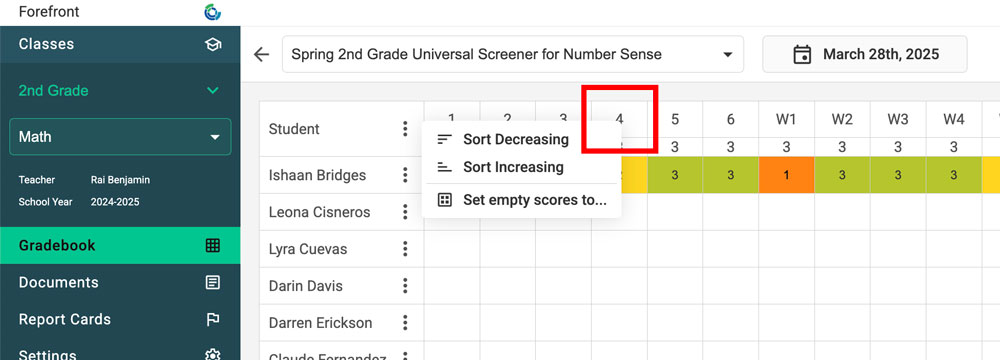
To set scores to max, min, or other value by student, or reset the row data, click the three-dot menu to the right of the student name. Note: If the option is greyed out, make sure you are clicked into the correct date tab at the bottom.

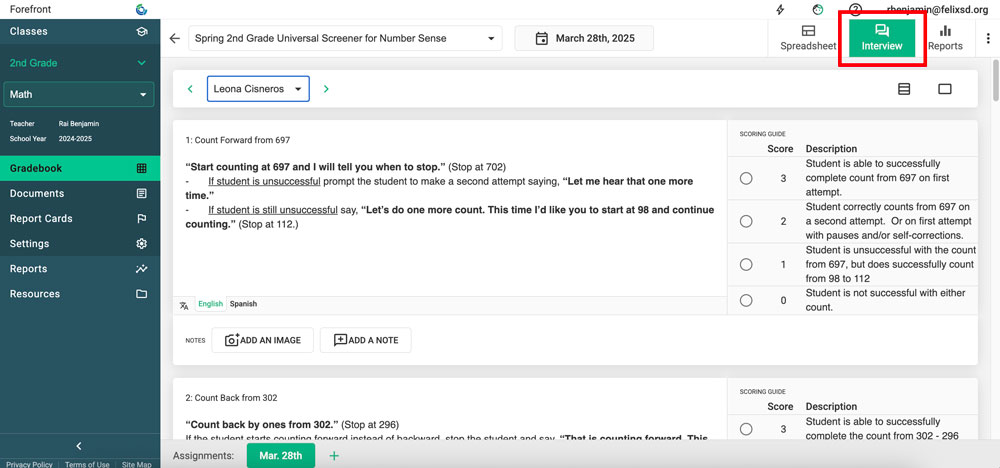
Interview Tool
For assessments given as interviews, the interview tool is helpful for assessment administration and scoring. For interview assessments, clicking "Interview" opens a view where the script of the assessment and the rubric are accessible in one place. You can select the correct score from here, and it will feed into the spreadsheet. As you assess, add notes by clicking the note button below.
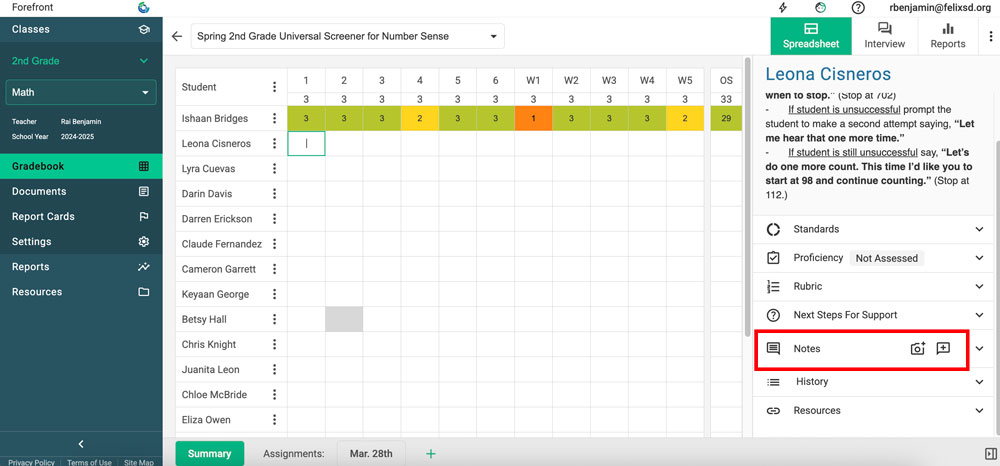
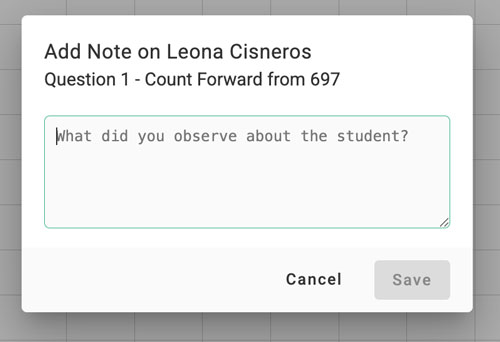
Add Notes
All assessment questions can have notes added to them for more comprehensive data. Note entry can be accessed two ways: by pressing "N" while in the spreadsheet view, and from the side navigation.
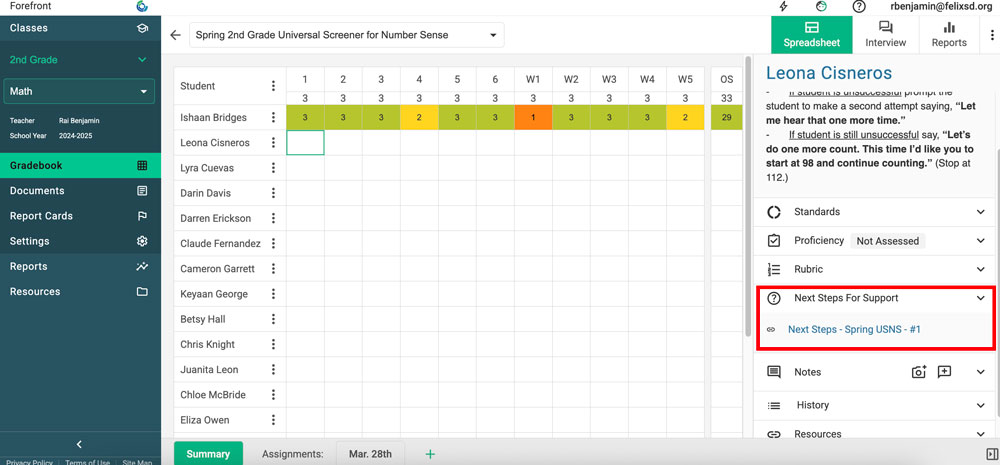
Accessing Next Steps
Programs may have Next Steps -- instructional activities and recommendations based on the assessed skills. (DIBELs, Bridges Third Edition, the Universal Screeners for Number Sense and the Fractional Reasoning Screeners have these preconfigured and they can also be configured for district custom assessments.) In the spreadsheet, access any available Next Steps by clicking in the right sidebar.
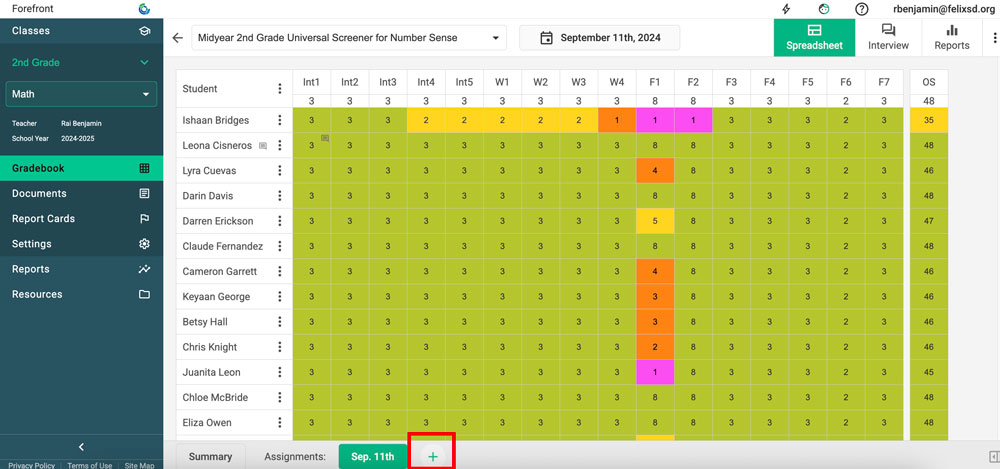
Reassessing
Forefront users can enter reassessment data in a single click. On the bottom of the spreadsheet, click the green plus and select the date of the reassessment. Reassessments for can be all or some students and for all of the assessment or certain questions.
Want to see how to view assessment data after it's entered?
How to Look at Class-Level Data
How to Look at Student-Level Data
Need more support?
Submit a support request or email our team at support@forefront.education.