This article explains how users at a school or district with a Leader User Experience (UX) and District Write role, including District Leaders and District Managers with a Leader UX, can upload historic results into the system using configured spreadsheets.
Before you begin: Determine the IDs used for students in Forefront.
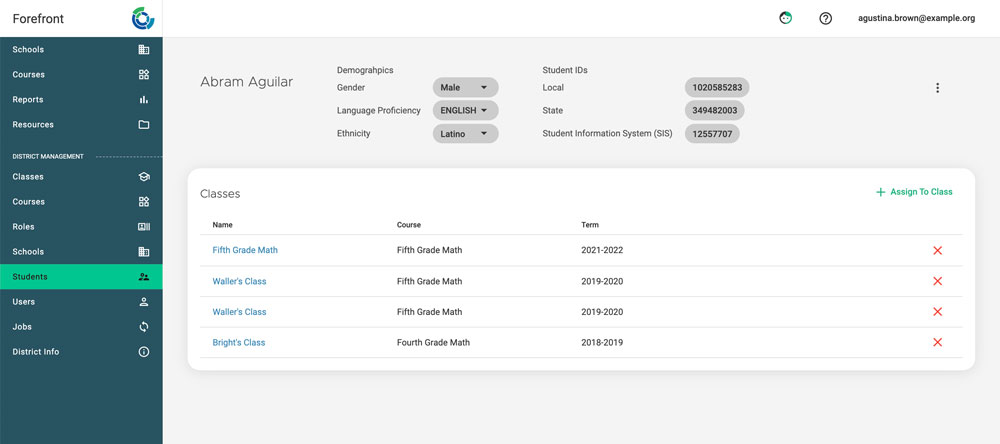
To upload historic data, students will be identified by their ID. Check to see what your account uses by going to “Students” in the left side navigation. Click on a student, and see what options for ID they have. This example student has a local, state, and SIS ID. Use the ID that is visible in Forefront and makes the most sense for the data upload.
Step 1: Navigate to the assessment that will have historic data uploaded to it using the Resources pages.
Step 2: Select the assessment for which you wish to upload historic results. Navigate to the “Data” tab as indicated in the screenshot below.
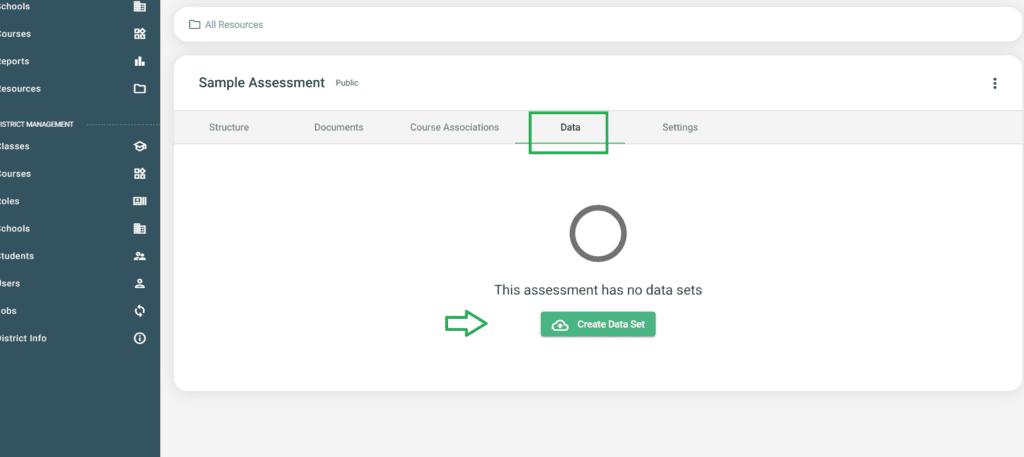
Step 3: Select “Create Data Set” to open the file importer.
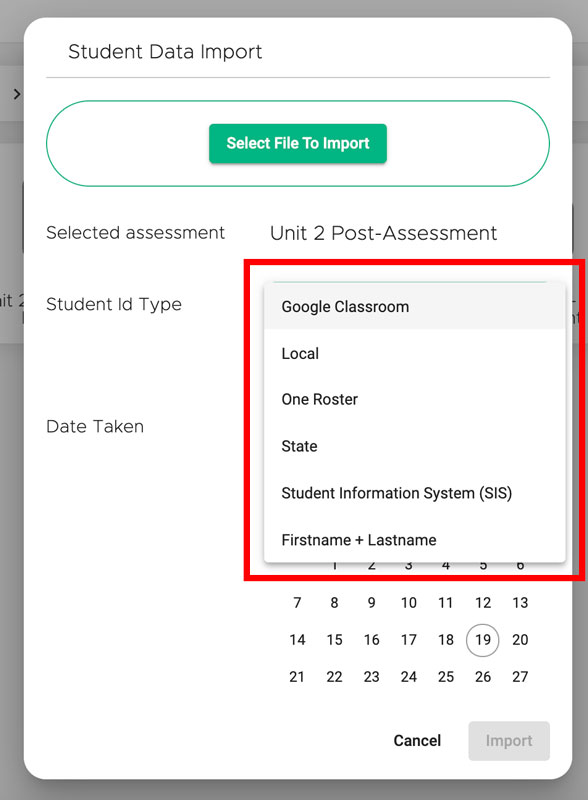
Step 4: Select the student ID type.
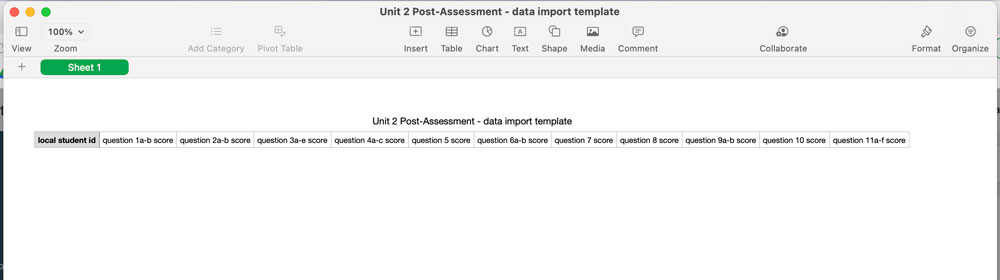
Step 5: Click “Download Data Template.”
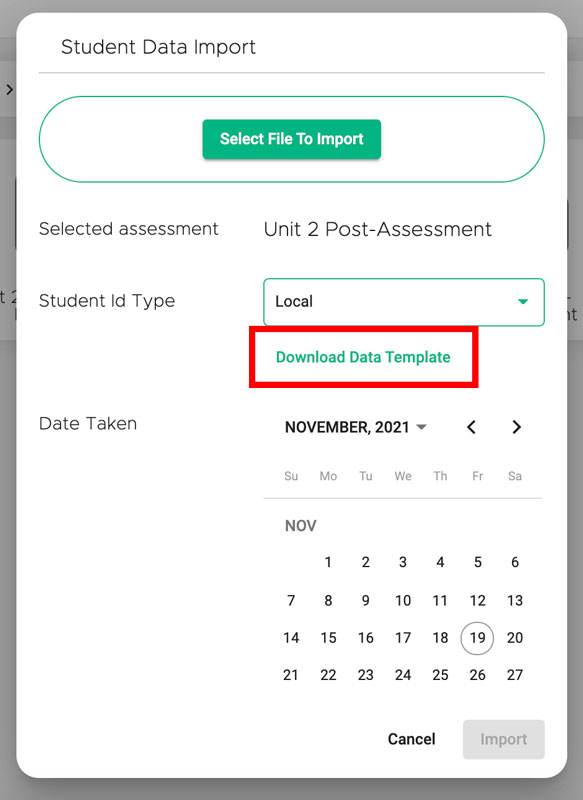
This will download a spreadsheet file with the top columns labeled. Those top column labels need to be in the file that is uploaded. If you have an existing spreadsheet, copy and paste and organize columns as needed to match the template.
Troubleshooting tip: The uploader cannot upload “Numbers” files. If you are using Numbers, export to a CSV.
Troubleshooting tip: Do not have any extra empty rows or columns in your file to upload.
Step 6: Upload the configured spreadsheet to Forefront, using the “Select File to Import” button.
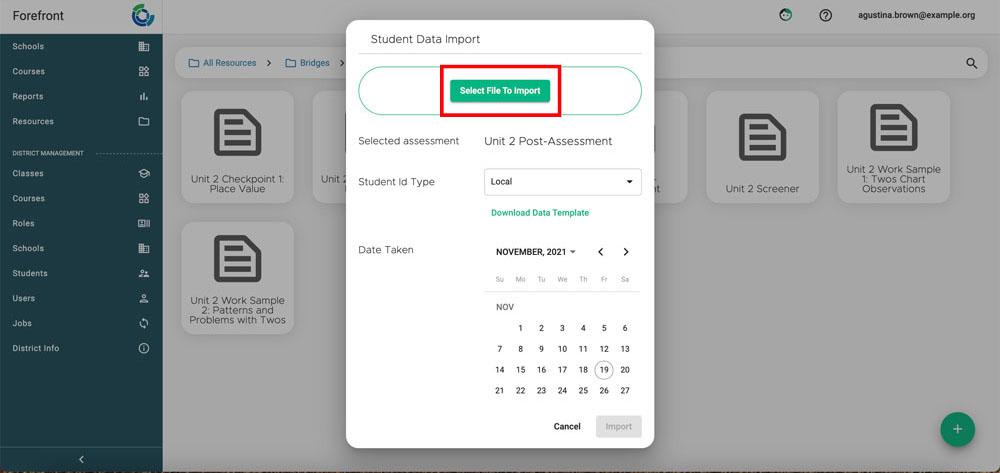
Step 7: Select the (approximate) date the assessment was originally taken.
Selecting the correct year and approximate month is critical.

Update: When should I allow teachers to merge scores? If you want scores to be only read-only, do not allow teachers to merge data. If this is their own historic data, or data they might need to modify, allow merging.
Step 8: Confirm the date, assessment, and file and click “Confirm.”
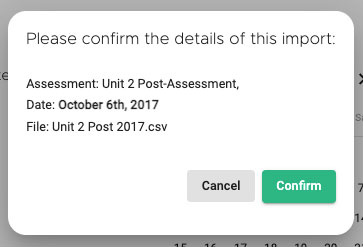
The job will run and a progress update will appear in the upper right. This will show if the job uploads successfully or errors.
Need more support?
Submit a support request or email our team at support@forefront.education.